> ## Documentation Index
> Fetch the complete documentation index at: https://docs.botmailroom.com/llms.txt
> Use this file to discover all available pages before exploring further.
# Quickstart
> Create an inbox and start receiving emails
## Web Application
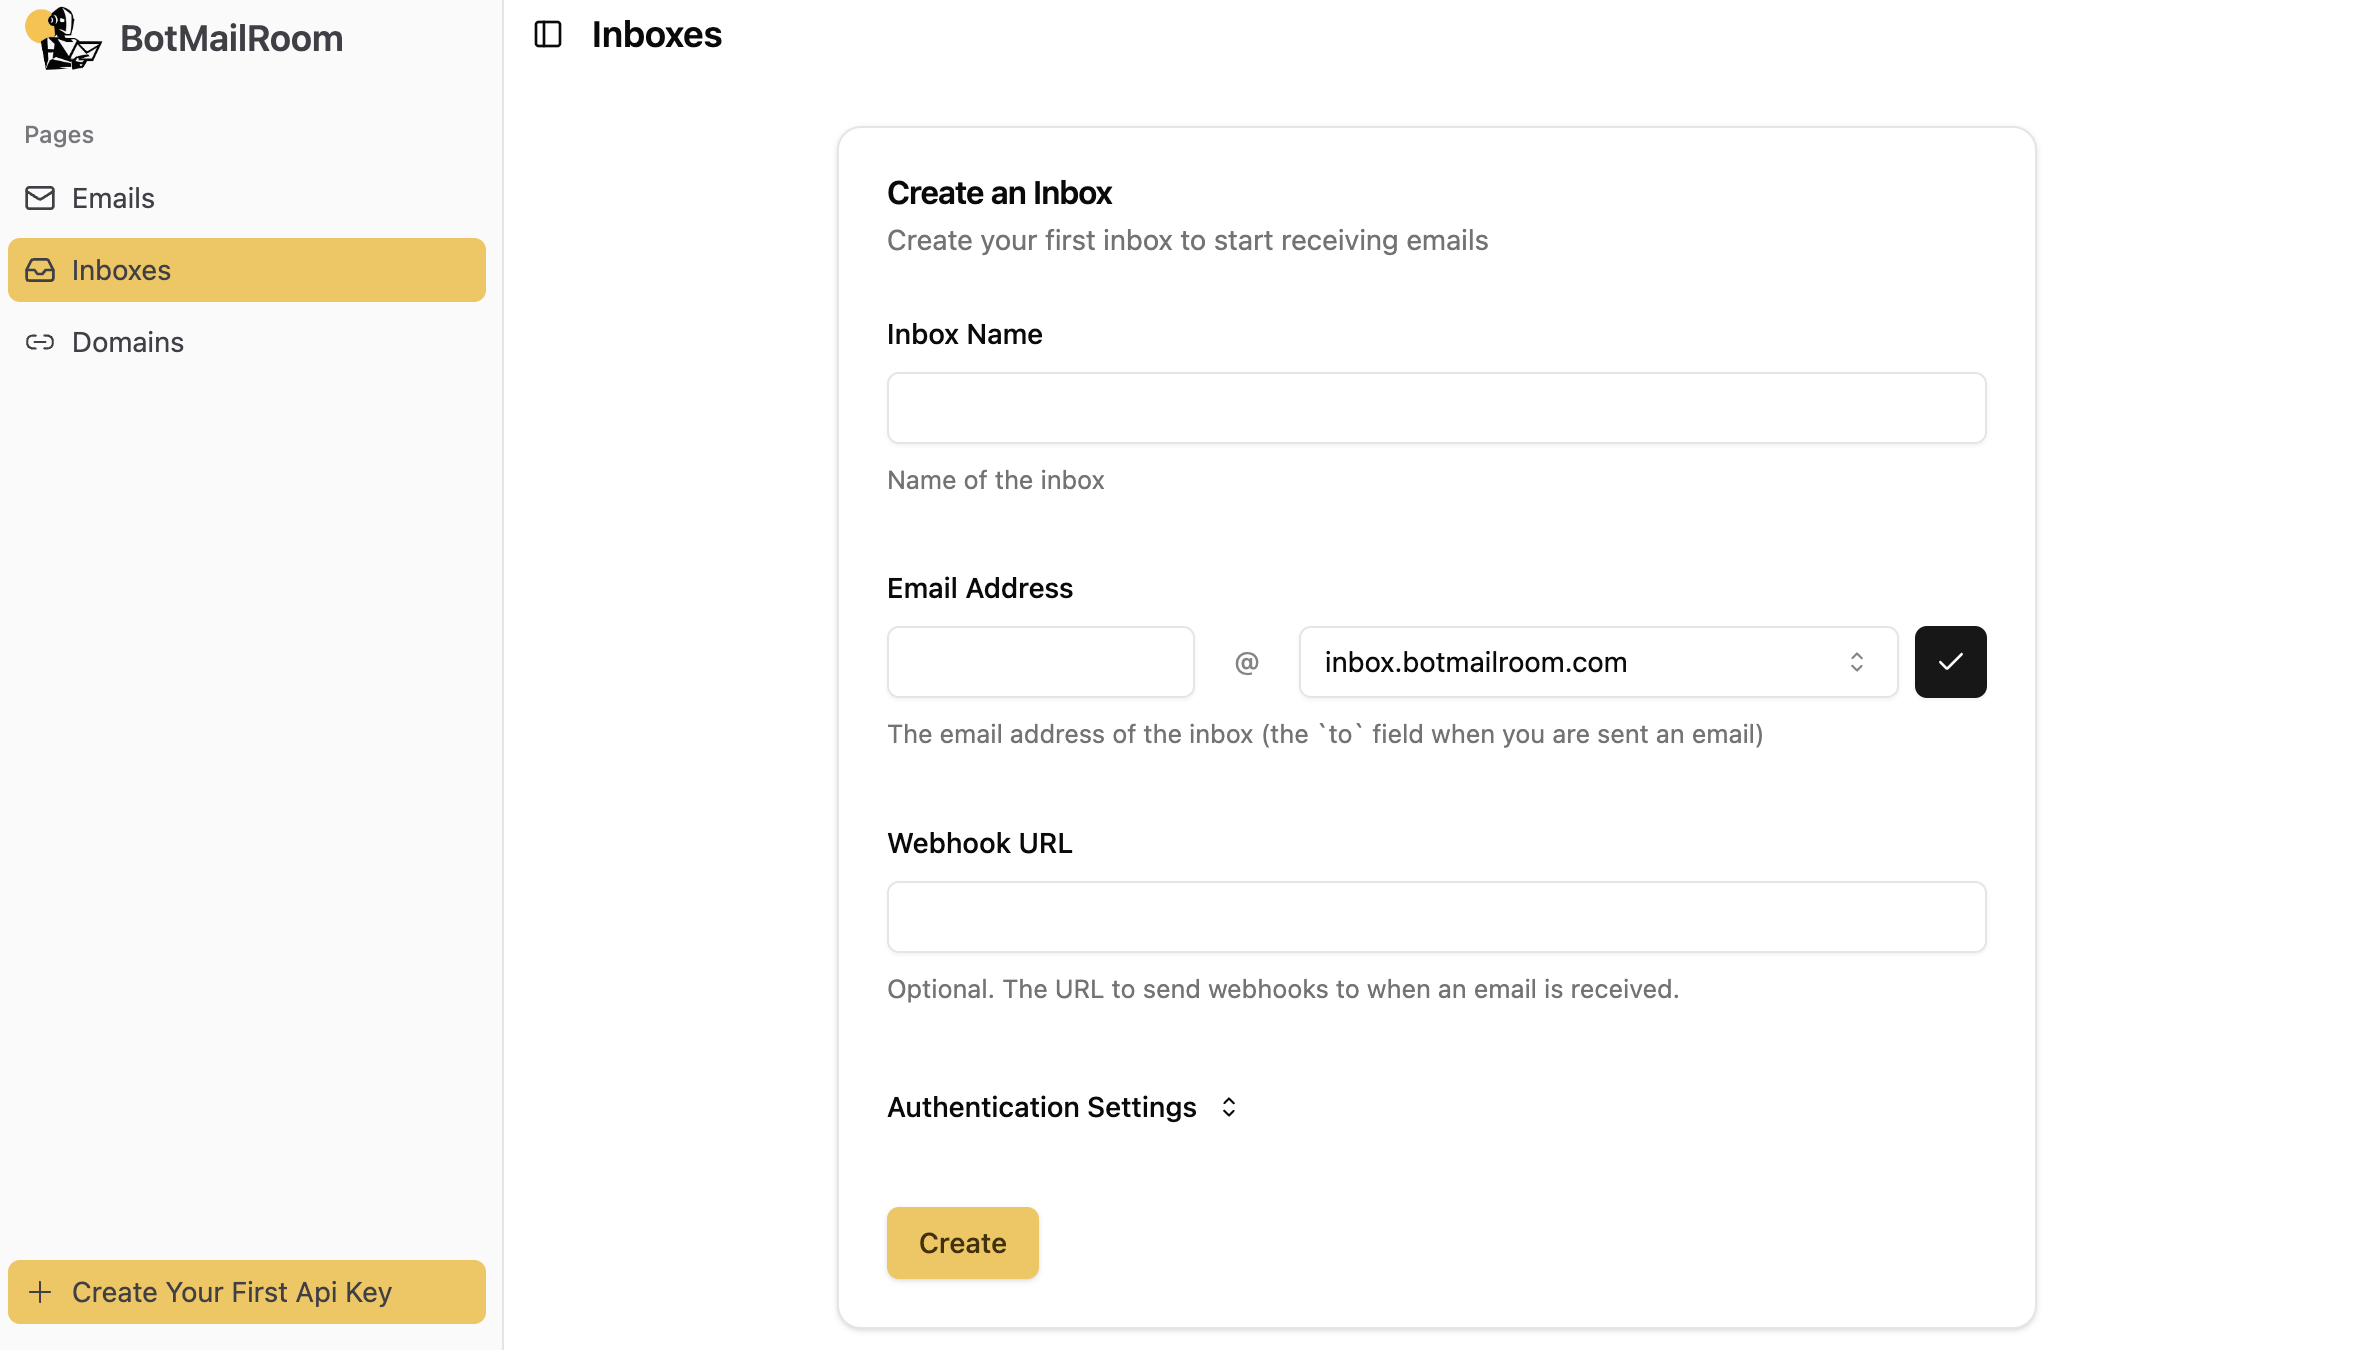
#### 1. Create an Inbox
An inbox is an email address that you can receive emails on. You can create an inbox by going to the [inboxes page](https://app.botmailroom.com/inbox).
 #### 2. Send an Email to Your Inbox
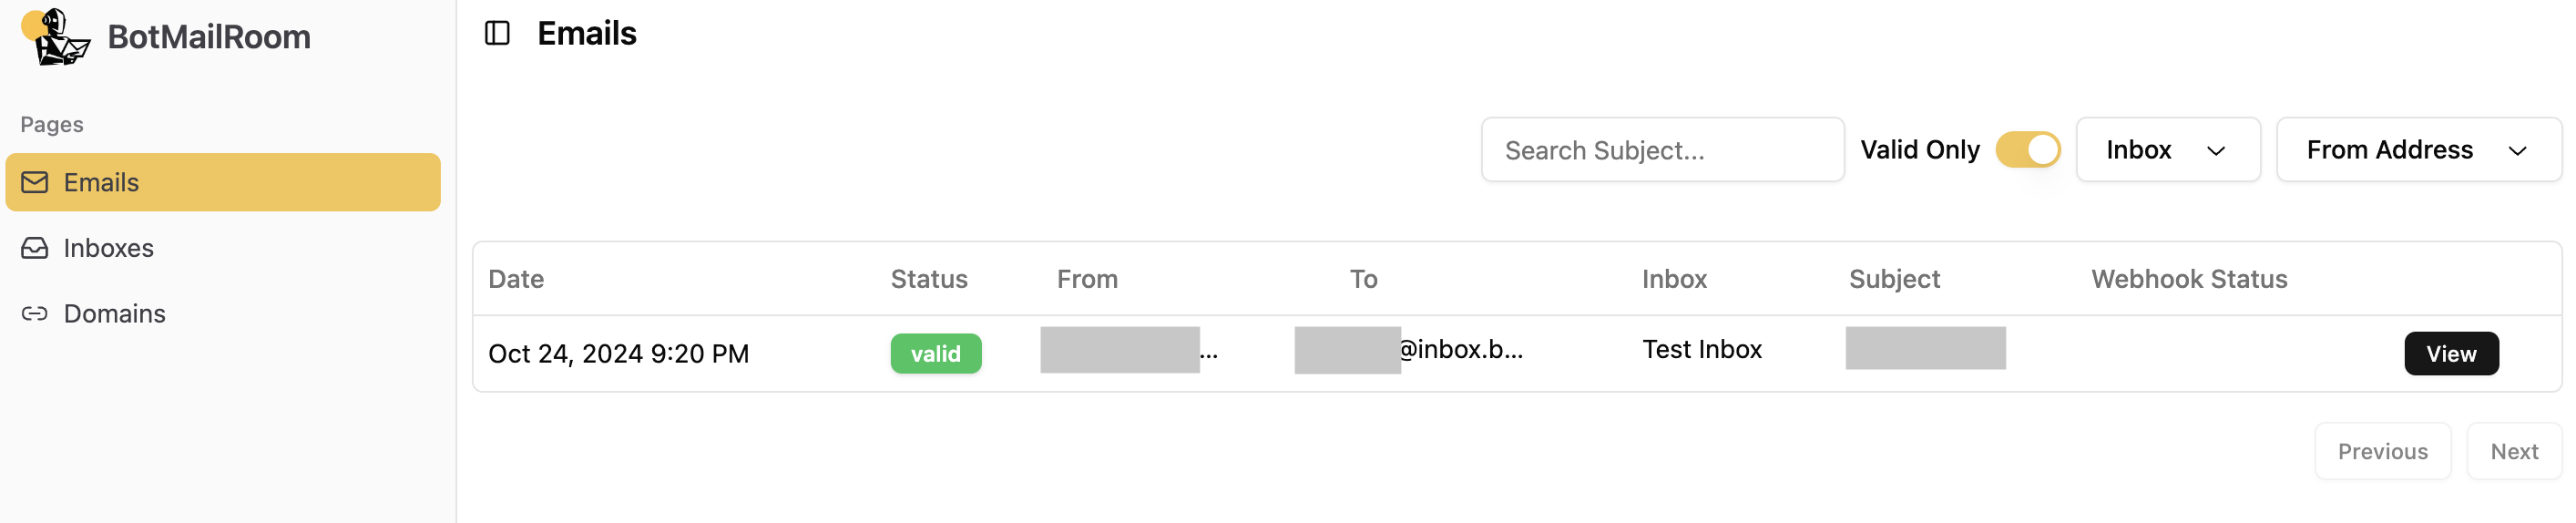
Unless you have specific allow and block rules that prevent it, you will receive an email from `support@inbox.botmailroom.com` after you create an inbox for the first time. If you'd like to send a test email to your inbox, you can do so by sending a test email to the address of the inbox:
1. Using a mail client of your choice.
2. [Sending a request with BotMailRoom](/documentation/send-email)
Once you receive an email, you should see it in the [emails page](https://app.botmailroom.com/).
#### 2. Send an Email to Your Inbox
Unless you have specific allow and block rules that prevent it, you will receive an email from `support@inbox.botmailroom.com` after you create an inbox for the first time. If you'd like to send a test email to your inbox, you can do so by sending a test email to the address of the inbox:
1. Using a mail client of your choice.
2. [Sending a request with BotMailRoom](/documentation/send-email)
Once you receive an email, you should see it in the [emails page](https://app.botmailroom.com/).
 ## REST API
#### 1. Create an Api Key (if you don't already have one)
#### 2. Create an Inbox
Send a request to the [upsert inbox endpoint](/documentation/api-reference/inbox/upsert-inbox) to create an inbox. The below is an example of how to do this in bash, but the linked documentation also contains examples in other languages.
Make sure to replace `CHANGE_THIS` with the actual email address you want to
use for your inbox. Also remember to pass the `api_key` you created in the
previous step in the `Authorization` header.
```bash
curl -X POST "https://api.botmailroom.com/api/v1/inbox/upsert" \
-H "Authorization: Bearer ${api_key}" \
-H "Content-Type: application/json" \
-d '{
"id": None,
"name": "My First Inbox",
"email_address": "CHANGE_THIS@inbox.botmailroom.com",
}'
```
#### 3. Send an Email to Your Inbox
Unless you have specific allow and block rules that prevent it, you will receive an email from `support@inbox.botmailroom.com` after you create an inbox for the first time. If you'd like to send a test email to your inbox, you can do so by sending a test email to the address of the inbox:
1. Using a mail client of your choice.
2. [Sending a request with BotMailRoom](/documentation/send-email)
After sending the email, send a request to the [get emails endpoint](/documentation/api-reference/email/get-emails) to get the metadata of the email you just sent. The below is an example of how to do this in bash, but the linked documentation also contains examples in other languages.
Make sure to pass the `api_key` you created in the previous step in the
`Authorization` header.
```bash
curl -X GET "https://api.botmailroom.com/api/v1/email" \
-H "Authorization: Bearer ${api_key}"
```
## Python Client
The BotMailRoom python client provides both a synchronous and asynchronous interface for interacting with the BotMailRoom API.
#### 1. Create an Api Key (if you don't already have one)
#### 2. Install the Client
```bash
pip install botmailroom
```
#### 3. Initialize the Client
```python
from botmailroom import BotMailRoom
client = BotMailRoom(api_key="your_api_key") # or set the BOTMAILROOM_API_KEY environment variable
```
#### 4. Create an Inbox
Make sure to replace `CHANGE_THIS` with the actual email address you want to
use for your inbox
```python
inbox = client.create_inbox(name="My Inbox", email_address="CHANGE_THIS@inbox.botmailroom.com")
```
#### 5. Check Emails
Unless you have specific allow and block rules that prevent it, you will receive an email from `support@inbox.botmailroom.com` after you create an inbox for the first time. If you'd like to send a test email to your inbox, you can do so by sending a test email to the address of the inbox:
1. Using a mail client of your choice.
2. [Sending a request with BotMailRoom](/documentation/send-email)
You can then check for new emails using the `get_emails` method.
```python
emails = client.get_emails(inbox_ids=[inbox.id])
print(emails)
```
## TypeScript Client
The BotMailRoom TypeScript client provides an interface for interacting with the BotMailRoom API.
#### 1. Create an Api Key (if you don't already have one)
#### 2. Install the Client
```bash
npm install botmailroom
# or
yarn add botmailroom
```
#### 3. Initialize the Client
```typescript
import { BotMailRoom } from "botmailroom";
const client = new BotMailRoom("your_api_key"); // or set the BOTMAILROOM_API_KEY environment variable
```
#### 4. Create an Inbox
Make sure to replace `CHANGE_THIS` with the actual email address you want to
use for your inbox
```typescript
const inbox = await client.createInbox({
name: "My Inbox",
emailAddress: "CHANGE_THIS@inbox.botmailroom.com",
});
```
#### 5. Check Emails
Unless you have specific allow and block rules that prevent it, you will receive an email from `support@inbox.botmailroom.com` after you create an inbox for the first time. If you'd like to send a test email to your inbox, you can do so by sending a test email to the address of the inbox:
1. Using a mail client of your choice.
2. [Sending a request with BotMailRoom](/documentation/send-email)
You can then check for new emails using the `getEmails` method.
```typescript
const emails = await client.getEmails({
inboxIds: [inbox.id],
});
console.log(emails);
```
## REST API
#### 1. Create an Api Key (if you don't already have one)
#### 2. Create an Inbox
Send a request to the [upsert inbox endpoint](/documentation/api-reference/inbox/upsert-inbox) to create an inbox. The below is an example of how to do this in bash, but the linked documentation also contains examples in other languages.
Make sure to replace `CHANGE_THIS` with the actual email address you want to
use for your inbox. Also remember to pass the `api_key` you created in the
previous step in the `Authorization` header.
```bash
curl -X POST "https://api.botmailroom.com/api/v1/inbox/upsert" \
-H "Authorization: Bearer ${api_key}" \
-H "Content-Type: application/json" \
-d '{
"id": None,
"name": "My First Inbox",
"email_address": "CHANGE_THIS@inbox.botmailroom.com",
}'
```
#### 3. Send an Email to Your Inbox
Unless you have specific allow and block rules that prevent it, you will receive an email from `support@inbox.botmailroom.com` after you create an inbox for the first time. If you'd like to send a test email to your inbox, you can do so by sending a test email to the address of the inbox:
1. Using a mail client of your choice.
2. [Sending a request with BotMailRoom](/documentation/send-email)
After sending the email, send a request to the [get emails endpoint](/documentation/api-reference/email/get-emails) to get the metadata of the email you just sent. The below is an example of how to do this in bash, but the linked documentation also contains examples in other languages.
Make sure to pass the `api_key` you created in the previous step in the
`Authorization` header.
```bash
curl -X GET "https://api.botmailroom.com/api/v1/email" \
-H "Authorization: Bearer ${api_key}"
```
## Python Client
The BotMailRoom python client provides both a synchronous and asynchronous interface for interacting with the BotMailRoom API.
#### 1. Create an Api Key (if you don't already have one)
#### 2. Install the Client
```bash
pip install botmailroom
```
#### 3. Initialize the Client
```python
from botmailroom import BotMailRoom
client = BotMailRoom(api_key="your_api_key") # or set the BOTMAILROOM_API_KEY environment variable
```
#### 4. Create an Inbox
Make sure to replace `CHANGE_THIS` with the actual email address you want to
use for your inbox
```python
inbox = client.create_inbox(name="My Inbox", email_address="CHANGE_THIS@inbox.botmailroom.com")
```
#### 5. Check Emails
Unless you have specific allow and block rules that prevent it, you will receive an email from `support@inbox.botmailroom.com` after you create an inbox for the first time. If you'd like to send a test email to your inbox, you can do so by sending a test email to the address of the inbox:
1. Using a mail client of your choice.
2. [Sending a request with BotMailRoom](/documentation/send-email)
You can then check for new emails using the `get_emails` method.
```python
emails = client.get_emails(inbox_ids=[inbox.id])
print(emails)
```
## TypeScript Client
The BotMailRoom TypeScript client provides an interface for interacting with the BotMailRoom API.
#### 1. Create an Api Key (if you don't already have one)
#### 2. Install the Client
```bash
npm install botmailroom
# or
yarn add botmailroom
```
#### 3. Initialize the Client
```typescript
import { BotMailRoom } from "botmailroom";
const client = new BotMailRoom("your_api_key"); // or set the BOTMAILROOM_API_KEY environment variable
```
#### 4. Create an Inbox
Make sure to replace `CHANGE_THIS` with the actual email address you want to
use for your inbox
```typescript
const inbox = await client.createInbox({
name: "My Inbox",
emailAddress: "CHANGE_THIS@inbox.botmailroom.com",
});
```
#### 5. Check Emails
Unless you have specific allow and block rules that prevent it, you will receive an email from `support@inbox.botmailroom.com` after you create an inbox for the first time. If you'd like to send a test email to your inbox, you can do so by sending a test email to the address of the inbox:
1. Using a mail client of your choice.
2. [Sending a request with BotMailRoom](/documentation/send-email)
You can then check for new emails using the `getEmails` method.
```typescript
const emails = await client.getEmails({
inboxIds: [inbox.id],
});
console.log(emails);
```